Presented here underneath you'll find some professional points regarding Steps to Cleaning Your Sump Pump Properly.
Sump pumps are vital components in numerous homes, especially in locations susceptible to flooding or extreme moisture. They assist protect against water damages by efficiently getting rid of excess water from cellars or crawl spaces. Nevertheless, like any other device, sump pumps require regular maintenance to ensure they operate properly when needed one of the most. Cleaning your sump pump is an important part of its upkeep, and comprehending just how to do it effectively can save you from expensive repair services and prospective disasters.
Introduction
Preserving a tidy sump pump is important for its correct performance and durability. Disregarding this vital job can bring about clogs, malfunctions, and ultimately, water damages to your property. Therefore, learning how to clean up a sump pump is vital for home owners that depend on these devices to maintain their cellars completely dry and secured.
Indicators of a Dirty Sump Pump
Knowing when your sump pump requires cleaning is essential for preventing prospective breakdowns. Some usual signs that indicate a dirty sump pump include unusual noises throughout procedure, reduced water circulation, and noticeable debris in the pit. If you see any one of these signs and symptoms, it's vital to cleanse your sump pump promptly to avoid any additional issues.
Preparing for Cleansing
Before you start cleaning your sump pump, it's necessary to take some safety preventative measures. Begin by shutting down the power to the pump to avoid any type of electric mishaps. Additionally, put on ideal safety gear, such as gloves and safety glasses, to secure on your own from dirt, debris, and potential pathogens.
Understanding the Sump Pump
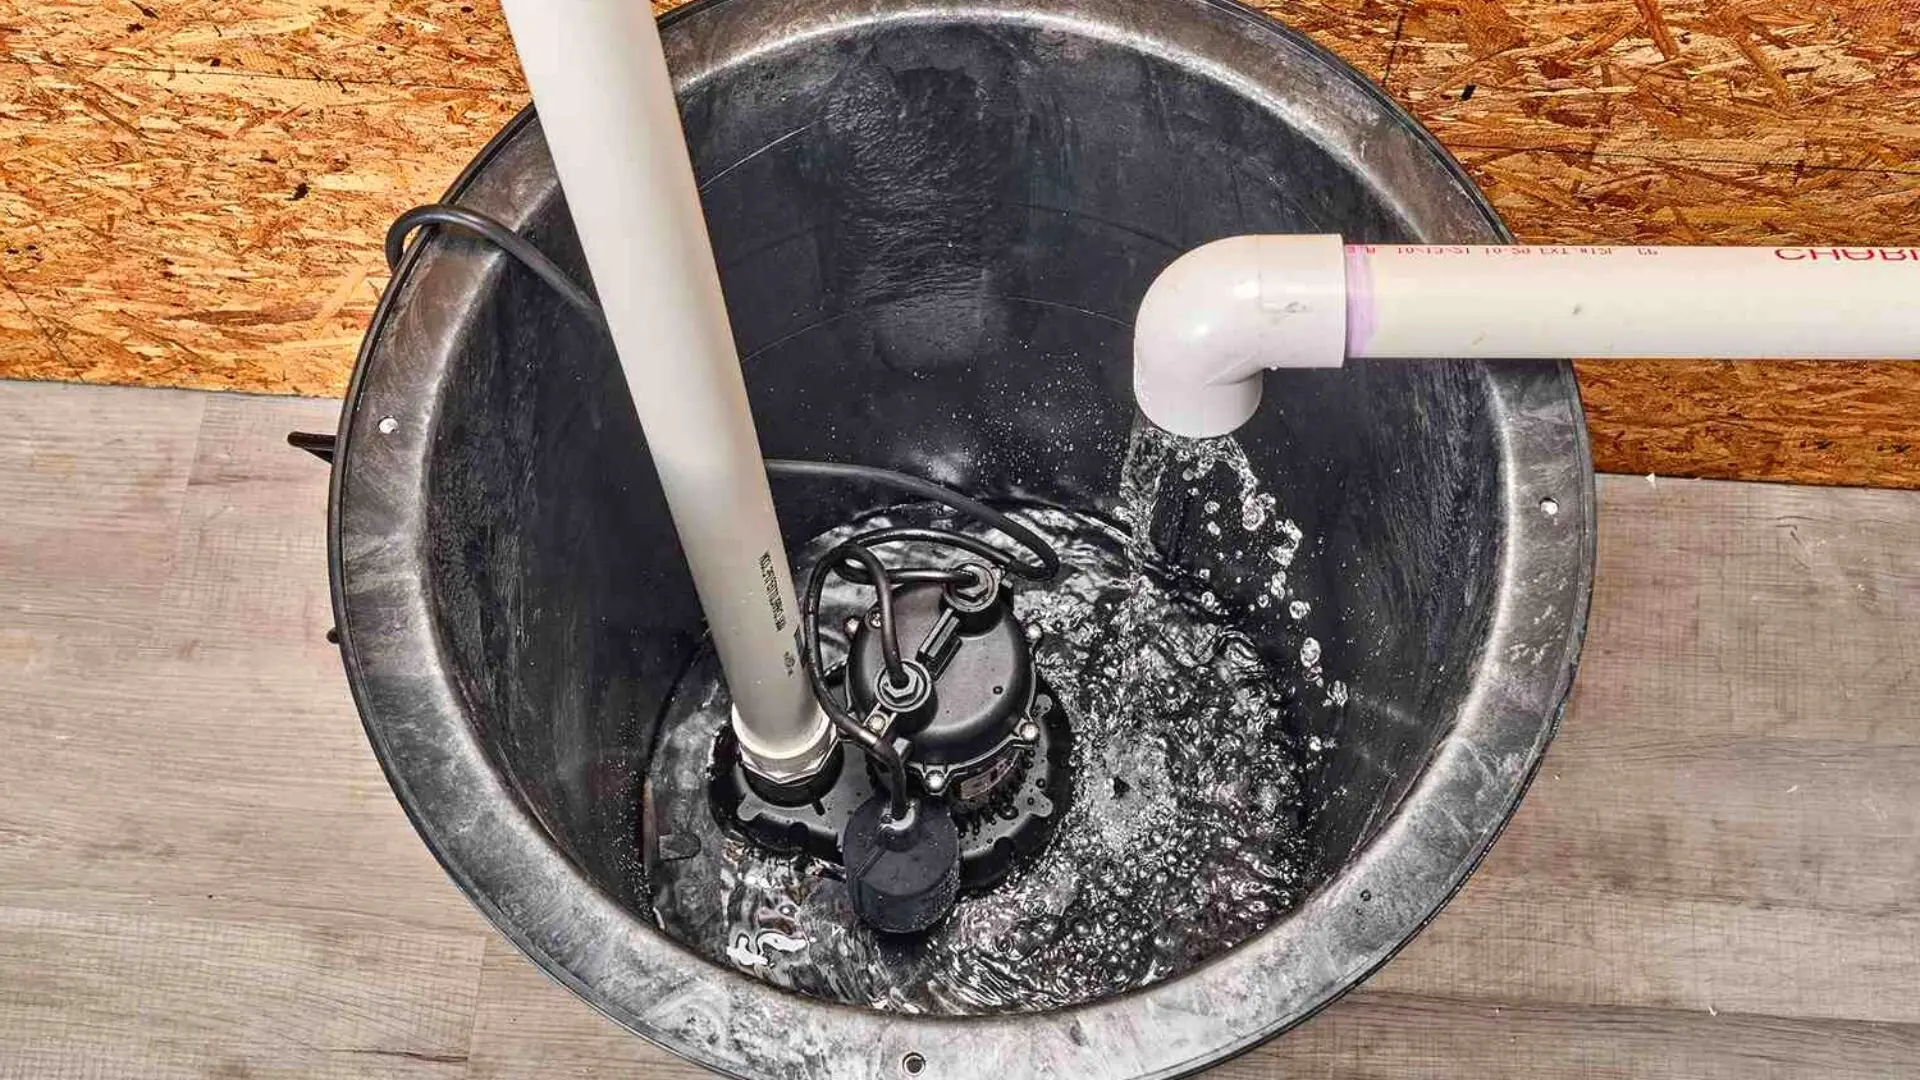
Prior to diving right into the cleaning process, it's important to have a standard understanding of just how a sump pump works. Typically installed in a pit or container below the cellar floor, a sump pump includes several key parts, including a pump, a float switch, and a discharge pipeline. When water collects in the pit, the float button activates the pump, which then pumps the water out via the discharge pipeline, far from the structure's foundation.
Detailed Overview to Cleansing a Sump Pump
Turning off the Power
Begin by separating the power supply to the sump pump to prevent any accidents while cleansing.
Looking For Correct Performance
Prior to re-installing the pump, do a fast examination to make sure that the float switch activates the pump properly. Put some water into the sump pit and observe the pump's operation. If every little thing is working correctly, you can reassemble the pump and reconnect the power supply.
Removing Debris and Dust
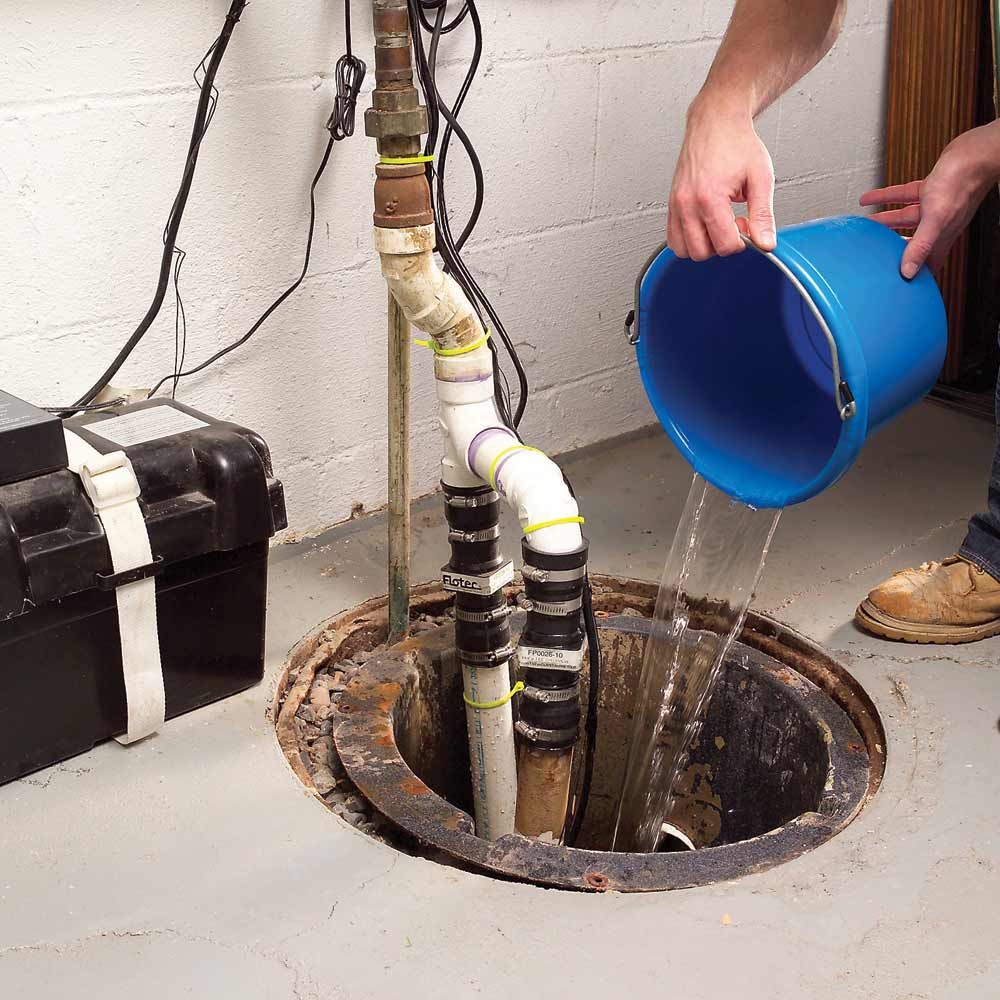
Utilize a bucket or an inside story to eliminate any noticeable debris, dust, or sediment from the sump pit. Dispose of the particles appropriately to prevent it from obstructing the pump or the discharge pipeline.
Cleansing the Pump and Float Switch
When the pit is clear of particles, thoroughly get rid of the pump from the pit. Inspect the pump and the float button for any signs of damages or wear. Make use of a soft brush or fabric to cleanse the surface areas and remove any kind of gathered crud.
Purging the System
After cleaning the pump and float button, purge the sump pit with tidy water to get rid of any kind of staying dust or sediment. This will certainly aid ensure that the pump runs efficiently and successfully.
Maintenance Tips to Keep Your Sump Pump Clean
Along with routine cleansing, there are a number of maintenance pointers you can follow to keep your sump pump in optimal problem:
Verdict
Cleansing your sump pump is a crucial aspect of its maintenance and guarantees that it operates effectively when you need it the most. By following the actions outlined in this guide and including routine upkeep into your routine, you can extend the life-span of your sump pump and secure your home from water damages.
How To Clean A Sump Pump Properly
Electricity
The first step will be to ensure that you stay safe or that the professional is safe. You will need to unplug the power cord to the sump pump. Or, if it happens to be hard wired into place, you will need to turn the breaker off that is going to the pump. You don’t ever want to try to maintain, clean, or repair a piece of electrical machinery with the electricity still feeding it.
Turn the water off
You will be working on your sump pump cleaning, so you will want to make sure that if any drains are feeding into the pump pit, they have the water shut off to them, or it is known that no one should use them. You do not want to be halfway through the process of cleaning sump pump pit units out when a washing machine worth of water dumps on you.
Disconnect your pump
Your pump will be connected to a discharge pipe that will presumably go outside your home. You will need to disconnect this line to be able to remove the pump from the sump pump pit.
Wrap the pump
You will likely want to take your pump outside for a good sump pump cleaning. You will probably have to haul the pump through your house. So now is the time to wrap it in plastic, a trash bag, or even towels to keep it from dripping as you haul it outside.
Clean the pump
Now it is time to clean the pump. Take a garden hose and spray it down well. Make sure to get all sides of it and all the openings. You will want to wash all of the debris off that you can, but some of it may not come off so quickly, so you will have to introduce the scrub brush.
Depending on what your sump pump pit looks like, you may need to use a scrub brush to get the hard stuck on gunk and dirt off of the pump. A 50/50 mix of water and vinegar is an excellent sump pump cleaner.
Rinse the pump
Give your sump pump another good spray down with your garden hose. After you scrape off all of the extra gunk, it will need suitable spraying to get the rest of the stuff left before it is ready to be reinstalled back in the pit. And that is how to clean a sump pump — but, you aren’t quite done yet.
Drain the check valve
Depending on the location of your check valve, you may need to use a bucket to catch the water. But you will need to drain the water off of the check valve, which may be a significant amount depending on how long your drain is. Your check valve is a valve that will only allow the water to flow one way. So the water can be pushed out of the drain, but it cannot flow back into your sump pump pit. If your check valve comes apart, you can disassemble it and clean it to ensure it is clean and functioning correctly.
Wet/dry vac the water
You will need to vacuum the water out of your sump pump pit. You may also need to use the shop vac to clean up any water messes that have been made, depending on how bad the spills got
Clean and inspect the pit
The sump pump pit has removed the water, allowing you to give it a good visual inspection. Ensure there is no severe damage, that nothing is in the pit that can damage your sump pump and that it is not full of dirt that your pump can suck up. Next, spray it down with some disinfectant to ensure it is clean and ready to reinstall.
Hopefully you liked our topic on . Thanks a lot for taking the time to read through our piece. Don't hesitate to take the opportunity to share this blog posting if you enjoyed it. Thanks so much for taking the time to read it.
Show Details